Levitation is in simple terms “defying gravity”, when a person looks like flying in the air. Levitation photography is done by two methods:-
1. Subject is asked to jump in the air and is captured by camera while he is in air using high shutter speed
2. Two or more pictures are clicked first with flat background and then with subject. Later on these pictures are merged together, removing unnecessary objects using post-processing software e.g. photoshop etc
In this post I will talk about second method. This demo is for laymen and with limited resources, if you do not have photoshop and can’t afford to buy it, still you can do post-processing for levitation effects using free and legitimate online editor.
PREPARATION:
You need following equipments:-
a. DSLR Camera or any other camera which has manual settings.
b. Tripod
c. Cable Release/Remote (optional)
d. Model (Volunteer)
c. Chair or bench
Camera has to be kept in manual mode, place for clicking is to be identified which has uniform light availability. Mount camera on tripod and compose the frame. If you are not comfortable in setting manual focus, set focus point on the chair in the frame in AF mode and turn lens in manual mode. Focus point should not change in both pictures.
CLICKING PICTURES:
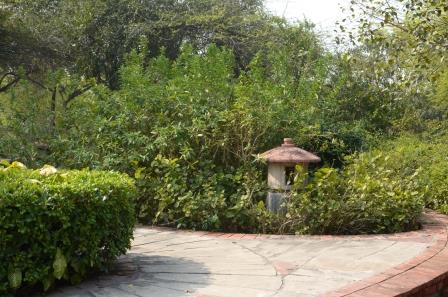
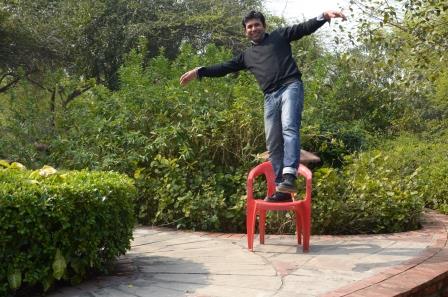
Click one picture with nothing in the frame. For second picture, keep chair in the frame and ask your model to stand on the chair and pretend to loosing balance (or any other pose as you may like). I took following two pictures for practising levitation.
POST-PROCESSING:
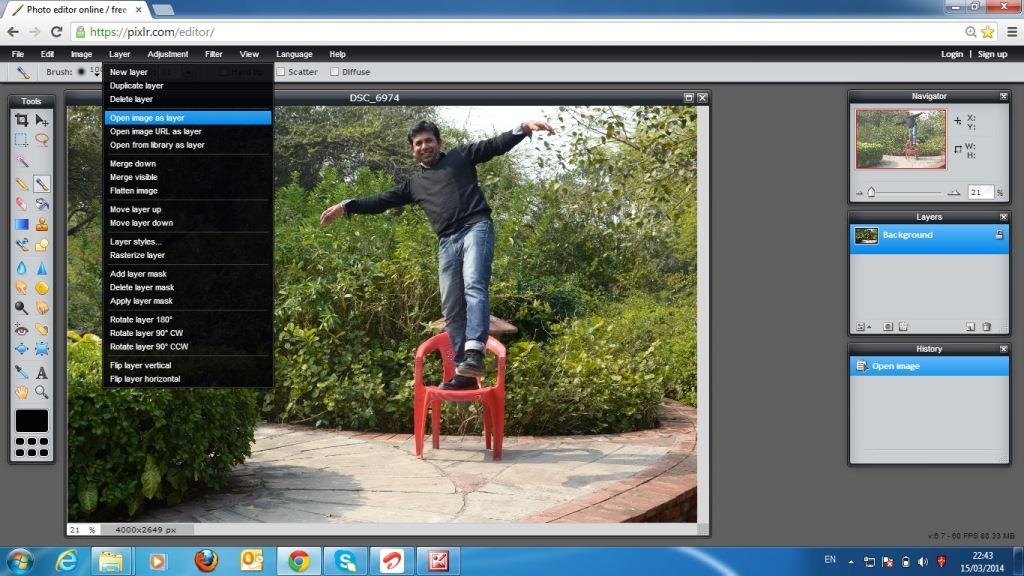
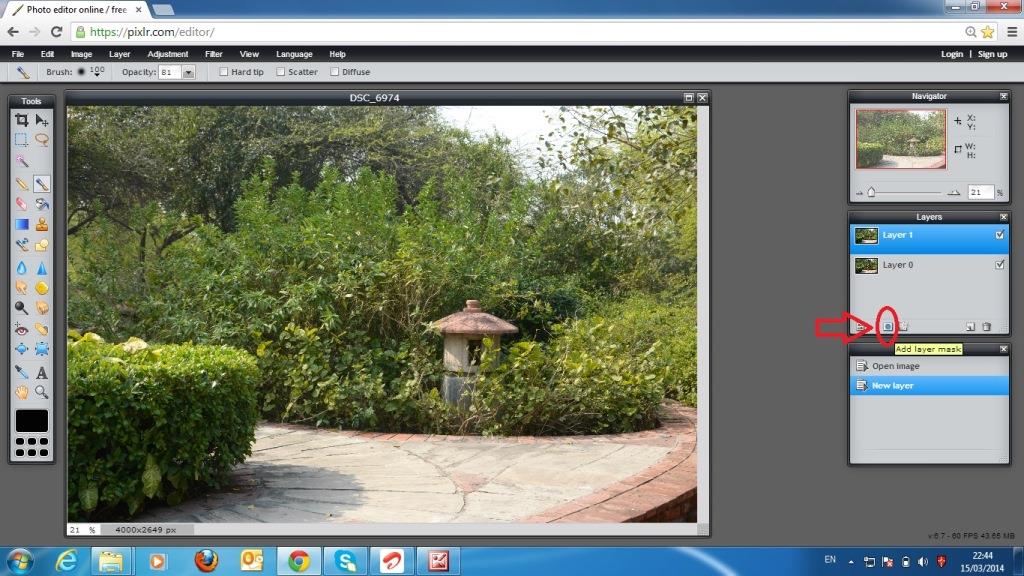
I used pixlr editor for post-processing of the pictures and to merge them into one. Pixlr editor is free to use website and no licence, registration or purchasing of software is required. You can directly type in browser “https://pixlr.com/editor/” and you will find following screen in your browser:-

Click on “Open Image from Computer” and select picture in which your model is standing on chair.

Once your one picture is open in the browser window, now you have to open next picture, which is without model and chair. Open this picture as layer. Click on “Layer” on top of the browser, it will open a sub-menu, select “open image as layer” and open next picture. Now both images are open in same file as two different layers.
Now you will see an icon of “lock” shown in front of one layer “background” in right hand side of the screen. Double click on this lock to open it.
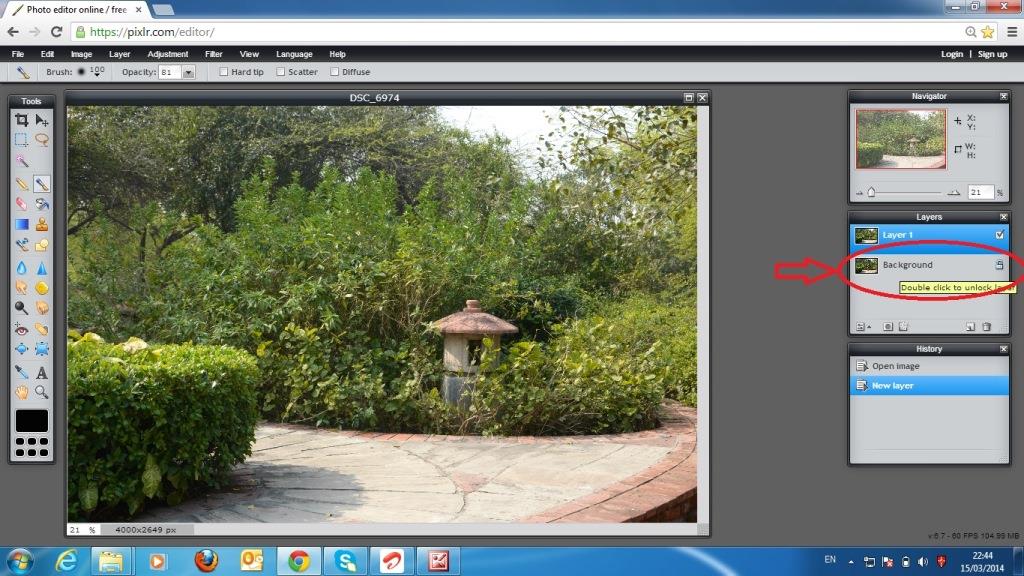
Click on first layer image “layer1” and click on “Mask” button, it will have subject of background layer visible in layer1 itself.
Now you can see subject and chair in the picture. To remove unwanted object i.e. chair from the picture select “brush tool” from left hand side panel.
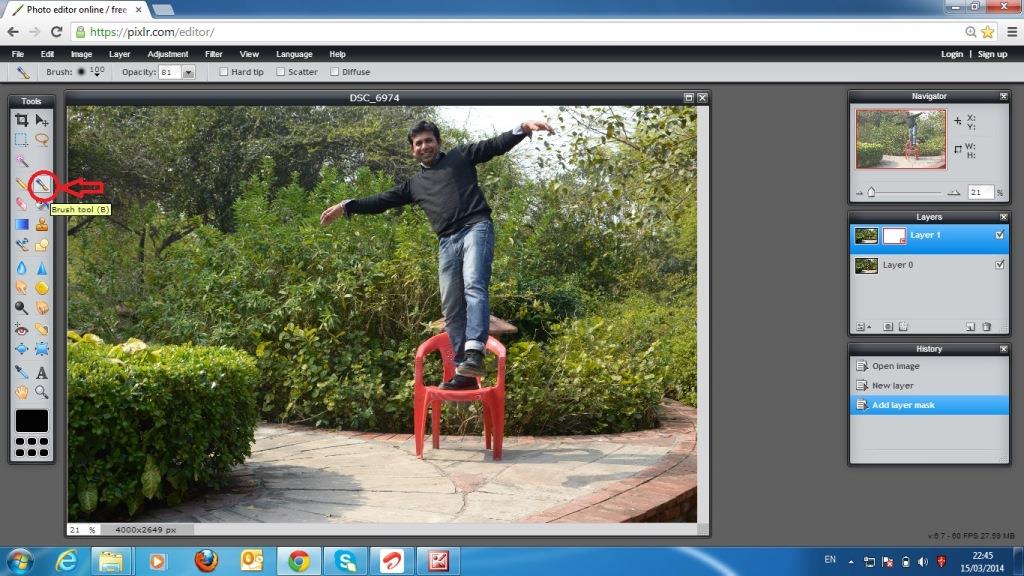
Size of the brush may be selected as per your preference and your level of comfort in moving the mouse. I had selected size as 100 as I was doing it roughly for demo purpose and limited time to work. It is recommended to keep brush size small for perfections in the work.

Opacity of the brush may be kept near 80, I did use 81 in this demo.

Now start moving cursor on chair with left button of the mouse pressed. Parts of the chair wherever mouse is moving is painted in default colour, keep on doing it slowly with patience, extra care is to be taken where lines are matching with main subject. It is recommended to keep maximum zoom level possible while doing this activity for better results.

Once you release left button of the mouse, entire area where brush was applied is gone and parts of the second picture fill that spot giving it a look as chair was not there at all. I faced a problem of “shockwave flash failure” many a times while doing this and your entire work is gone, you have to start afresh each time, hence it is recommended to cover maximum area without releasing left button of the mouse, may be repeated clicks lead to that failure (just a gut feeling, not sure though).
Once you are finished with this and satisfied that chair is not visible and picture is looking good, go to layer menu and select “flatten image”. It will merge both layers into one picture.

Now your levitation picture is ready and you can save it in your computer.

These were simple steps for levitation photography. You can try different angles and concepts and take it to next level of creativity.
Your critic and suggestions will help me to improve further.
Sumple process and great results . Looking forward to more tutorials on post processing .
Thanks Altanai… though I am not good at post processing but will try to post whatever I know 🙂
You used pixer editor but not photoshop but why?Is it comfortable use it? or it is individual preference? Because what you did for post processing in this software can be also done in photoshop?
Photoshop is a better option any day over pixlr editor. I do not have photoshop and many others also don’t have as one has to pay approx Rs 600-700 per month for its licence. So I have used pixlr editor that is free online utility and has some tolls similar to photoshop. This way anyone can use this post-processing irrespective if he has photoshop or not.
Pixlr is free. PS is not. I tried both and felt Pixlr was an easier process than PS. I teach high school digital photography and we will be doing this as a project!